Starry Night
Location - Enchanted Rock State Natural Area
One of the reasons photography fascinates me is because you can use it to get an alternate view of the world that otherwise does not exist. But that alternate view shines light on facts that you would normally not think about.
For example, if you squint at a street lamp in the night the light does turn into a star burst, a fact that you can capture with a small aperture on a camera!
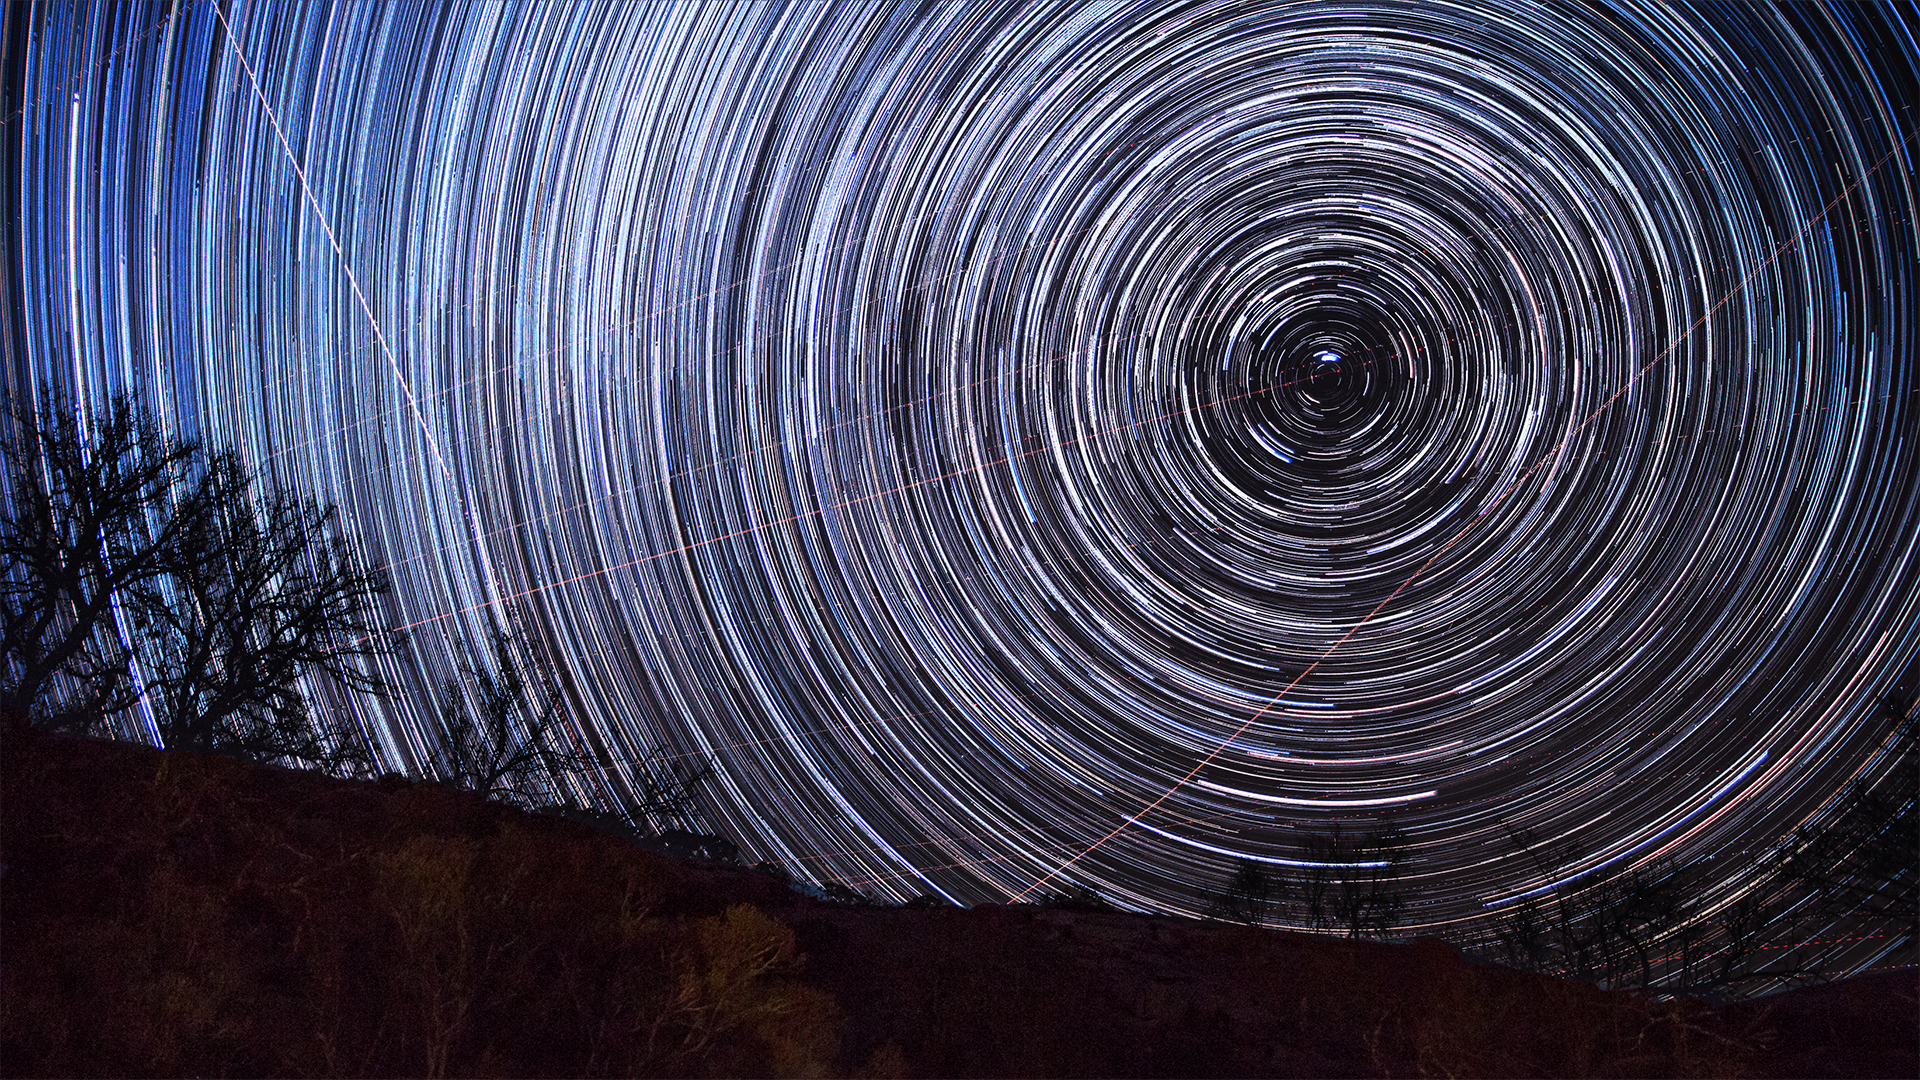
Star trails capture another such reality, the earth's Northern axis points approximately to the Polaris star and the rotation of the earth makes it seem that all other stars are spinning around it.
You can observe this very simply by first locating the Polaris by drawing a line through the two outer stars of the bowl of the Big Dipper
and then locating the stars and constellations relative to it in the rest of the sky. They seem to rotate around it. If you take a series of picture of these rotating stars at regular close intervals, stack them one over the other, and fill in the
gaps it will create a smooth arc just like the ones you can draw with a compass... except this is a really gigantic one!
| Lens | 17-55mm |
| Focal Length | 17mm |
| Aperture | f2.8 |
| Shutter Speed | 30 sec. |
| ISO | 800 |
But doing star trails always intimidated me. It sounded complex, technical and there were too many variables to take care of for it to really work – cold, dry, moonless, cloudless, very dark night; finding the Polaris;
wide angle, low f stop lens; preferably full frame camera; sturdy tripod; right exposure. Yes, you do need all of these but most importantly you will need the first one. It’s all about the location and the night you choose.
Enchanted Rock State Natural Area is an International Dark Sky Park
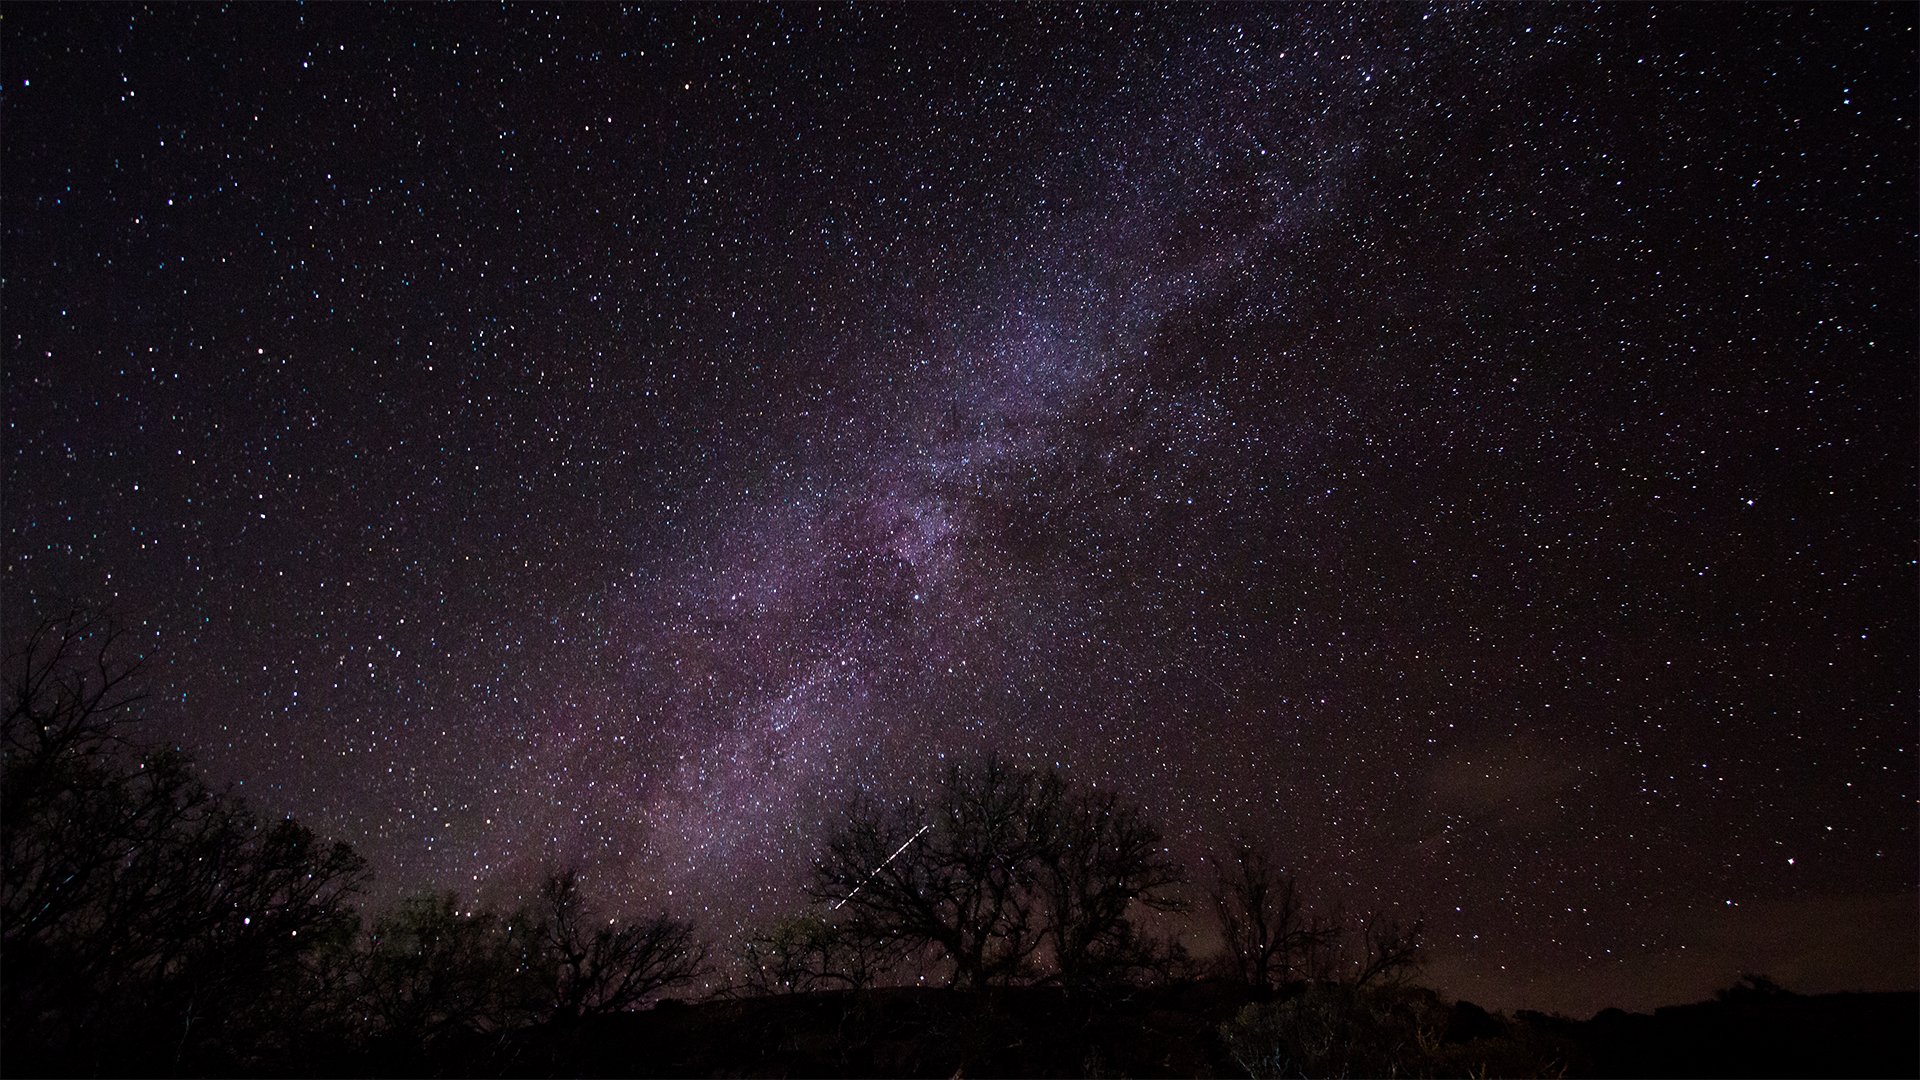
and therefore a perfect spot to shoot star trails... so I learnt from the websites. What I did not expect was how spectacular a really dark night looks like. They say that 80% of Americans will never see the milky way. I am glad to be in the other 20%.
We stayed at the camp grounds and after everyone went back to their tents it was pitch black everywhere except for the occasional climber coming down the rock with a flashlight. And even those flashlights did little to penetrate the dark that
covered everything so completely that you would not be able to see your own hands.
Setting up the camera was of course a challenge. I had set it up on the tripod (you will need a really sturdy one since sometimes it tends to be windy) when it was still light and had taken some test shots.
I had also tried to pre focus on infinity but that did not work very well when it came to the actual shooting. So here are the steps of how this photo was made:
- Set up the gear – Canon 70D on a MeFoto tripod, 17-55 EFS f2.8 lens, Neewer cable release, a heavy bag to hang on the tripod to add stability.
- Find the Polaris Star – I did this the previous night by finding Big Dipper. I had referenced a point on the mountain for where I knew I had to point my camera and it elevation.
- I started with a setting of ISO 1600, f2.8, 17mm, 30 secs. And set the camera to high speed continuous shooting and connect the cable release. I had to later bring down the ISO to 800 to reduce the amount of noise and to get the stars sharper.
- Set the camera to manual focus mode and focus on infinity. Though you can do this during the day by keeping the lens on auto focus and focusing on a really far off object, I had to redo the focus. If your lens has a focus marker with the infinity symbol you can focus using that. But do some test shots, zoom in all the way in preview and see if you are getting sharp stars.
- I used the inbuilt level of the 70D to make sure my camera was level to the horizon. You have to necessarily do this because you cannot see anything through the view finder. This is important so that you don’t have to unnecessarily crop to get the horizon straight.
- Once happy with the sharpness, noise and composition, I triggered the shutter with the cable release and locked the release button. This locks the camera to a continuous shooting mode where I captured one picture every 30 secs. Once I made sure the release was working, I went off to the dying campfire desperately trying to keep warm!
I did check once on the camera in the two hours that it was shooting. I would need to do it more often if was warmer because warmer conditions can create condensation on the lens. In the two hours that the camera was on, it shot about 250 photos.
For post processing of the photos it is pretty simple. I imported the raw files to Lightroom, adjusted the White Balance, Exposure, Sharpness and Noise to get something that looked decent on the first photo. Then I synchronized the rest to the master photo.
Exported the photos as full resolution JPEGS and loaded them on this fantastic free software called Star Stax. Once I loaded them on the software,
there is just a couple of buttons to click and the software does its magic to create the composite.
Astrophotography purists would say that you should get rid of the light trails left by planes and shooting stars but for this one I would like to leave them.
One for a very practical reason that taking those exposures out before running the Star Stax program will create gaps in the star trails but also for the very
fact that this is indeed what I saw that night, many, many flights that intersected the otherwise totally dark sky making me wonder about the people who were in those flights and
what were they dreaming? Did anyone try to peer down at the vast rock that lay below looking at them?
| Lens | 10-22mm |
| Focal Length | 10mm |
| Aperture | f3.5 |
| Shutter Speed | 30 sec. |
| ISO | 1600 |
The next night was very cloudy and therefore the best I could get was a picture of the Milky Way, not the best time of the year to get a photo of the Milky Way because of its position but I would take this any day.